Friday, November 14, 2014

Glamper Remodel: Replacing the Ceiling Panels

Removing  the ceiling "skin" will be necessary to access the framing and thus the damaged ceiling panels. The edges should have been "opened up" so that the side skin could be removed. (I also had to remove the ceiling vent). Note: Use 2 - 2x4's to stretch the width of the camper with another running the length to support your weight when on top of the camper!

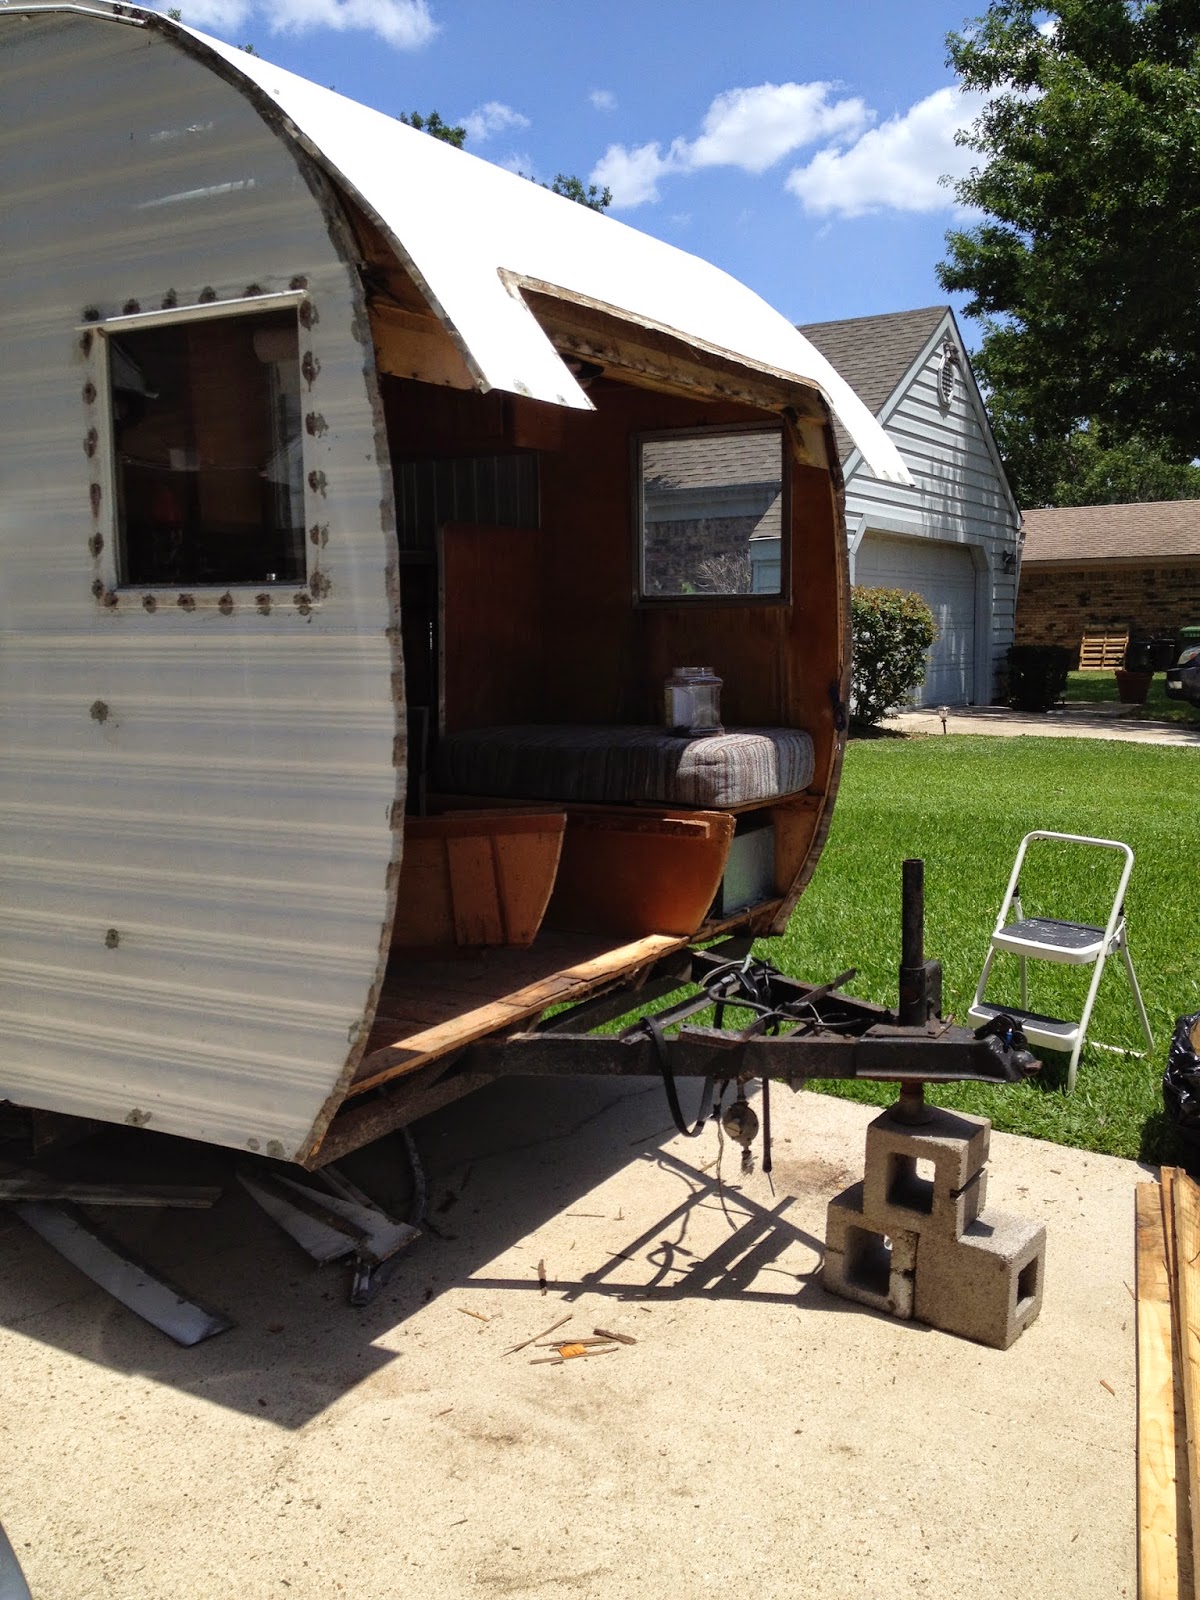
Since I didn't have the same set up as Larry at Canned Ham Trailers had demonstrated in his video series to lift and remove the ceiling skin, I had to come up with an alternative.  I placed lengths of PVC pipe under the skin, and with assistance "rolled" it off the front onto the driveway, where I flattened out the tabs, rolled it, tied it with string and stored it behind my storage shed.

Once removed, you are able to remove the center portion of the framing and any "curbing"on top of the wood paneling. I was able to re-use this section framing after replacing the ceiling panels (one at a time remember). If your camper had welt-cord between the walls/ceilings/cabinetry, you will need to replace it before adding the new ceiling panels. The welt cord is available from Vintage Trailer Supply and can be affixed with a plain-old staple gun. It also might be necessary to remove the strips covering the seam from the inside and remove staples that attach the ceiling panel to the frame. Just reverse the process at installation!

All other framing was new because I wanted to have it extend the complete width of the camper instead of being "toe-nailed" to the side walls. (That is where those notations you made earlier will come into play). Remember the front and back will not be closed for awhile :)

 
roof framing removed

ceiling panel removed forward of vent


replaced ceiling panel at vent area
When replacing each new panel, I used one of the nails I removed to "hold" it in position, then moved to the opposite side of the camper and tacked it into place with another nail. Using nails allows panel to pivot. Then I used a staple gun to complete the installation. Note: You don't need a lot of staples because it will be held in place by the framing member (at each seam) and the "curbing" at the edge.

After all ceiling panels that are damaged have been replaced,  then framing members can be replaced. At this time the electrical can also be run. (Just drop extra "romex" in locations that you fell you will need it later.)

Note: Depending on the construction of your trailer, it will also be necessary to remove the "curbing" at the edge of the trailer prior to removing the ceiling panels. Mine was constructed of three layers of 1/4" (nominal) plywood cut in 1" wide strips (across the grain so it would bend). I re-attached the curbing using 1/2" staples from an air compressor stapler between the re-attached framing members.

Next time we will talk about the wiring the electrical!

Happy Glamping!
Linked to:
Masterpiece Monday@ Boogieboard Cottage
Furniture Feature Friday @ Miss Mustard Seed

Sunday, November 9, 2014

Glamper Remodel:Supporting the Structure

Supporting the structure will be necessary if you need to replace the wood where it attaches to the 2x4 bolted to frame, or even replace the 2x4 itself.  I don't have any photos showing my supports, but I attempted to "draw" you what I did.

Front View:

Rear View:

 DO NOT unscrew anywhere the side wall attaches to the frame without providing support or your camper will "sink" and the side wall skin will not fit properly when you go to re-install. Once you have provided adequate "vertical" support you will be able to safely remove the nails/screws at the 2x4 located at the frame along the side of the camper at the wheel well area.


Note: 1x3 framing members are usually stapled together. You will need to remove the staples to replace any new framing members. You can easily remove the staples with pliers by wiggling them back and forth.


Here is the one I used: (available from your local hardware store)
Kreg Jr. Photo courtesy of Amazon.com

Happy Glamping!

linked up to:
Masterpiece Monday @ Boogieboard Cottage
Furniture Feature Friday @ Miss Mustard Seed

Tuesday, November 4, 2014

Glamper Remodel: Removing the Damaged Cabinets and Dinette Seats

Yowza! These babies don't really want to give up their parts. I of course, did it the hard way! Hopefully, you will do it the easy way!


Hard way: gently try to remove stripped screws (by any means necessary), pry up nails from the floor attachment and rip/tear from wall attachment.

Easy(r) way: gently try to remove stripped screws (by any means necessary), pry up nails from the floor attachment and then starting with the street side, remove and safely set aside (store) aluminum skin.

Using the Easy(r) method will gain access to the nails/staples holding the cabinets in at the side walls. Save yourself some grief and go ahead and remove the skin. You will need to anyway because you will have water damaged framing on the sides!


Note: I did not remove the upper cabinets across the front of the camper (over the dinette area) or the upper cabinets in the kitchen. Nor did I remove the closet/ice box cabinets. Don't forget to place those removed parts away for safekeeping!

Ignore the missing skin from the roof. I'll discuss that later. :)


When you have removed the side wall skin, you can easily access all the areas where you will need to replace water damaged framing,

Light colored wood is new.


Next post will discuss how to replace wood at the frame, without having the whole thing "sink" or collapse. I'm sure you would like to know how I accomplished that that!

Happy Glamping!

Linked to:
Wow Us Wednesday @Savvy Southern Style
 Furniture Feature Friday @ Miss Mustard Seed

Thursday, October 30, 2014

Glamper Remodel: Getting to the Heart of the Glamper

As my little glamper was a little rough on the insides (peeling veneer, original vinyl tile floor and water damage), it was necessary for me to open her up from both ends so that the bench seats, base kitchen cabinet and stove and stove cabinet could come out! Using the tips of marking the sides of the camper from my last post, I removed the windows from the front and back so that I could remove the aluminum skin from both ends.

Tip: use painters tape and permanent marker to label ALL pieces you remove. Also note if they are from the curb side (side of camper with door) or from the street side and with an "up" arrow.


1970's era AC unit removed from center position of front window


front window and eyebrow to be removed
Start removing the million little nails holding the "roof" skin down.Work gently so as not to damage the aluminum. Then proceed to remove the framing and interior paneling from the ends.


OPEN!
Wash, rinse and repeat at the rear of the camper! 
Don't forget to place that aluminum skin where it wont get damaged. I stored some under my camper and some I screwed to my fence in the backyard (using existing screw holes of course)

Happy Glamping!

Linked at:
 

Wednesday, October 29, 2014

Glamper Remodel: Starting the Demolition (and a little construction)

I equate restoring one of these beauties with peeling a hard boiled egg. First, you need to peel the shell, then take off the white to get to the yolk.  It is labor intensive, but if yours has as much mold as mine did, then it is necessary and the easiest way to replace all the interior paneling.

So using those handy tools I told you about, start removing the drip  (or "J") rail, and any windows that are in the way of removing the aluminum skin. after removing the million screws/nails holding the front/top/back skin on, gently move it out of your way.  Before removing any frame, use a permanent marker to note their location in the sides of the trailer. 


These notes will help when it is time to reassemble everything. (Also, DO NOT throw anything away, at least until you know you are done with that piece.) Removed pieces will be your template for new, and some items are IMPOSSIBLE to replace.

I'm getting a little ahead with these next photos, but I wanted to show how those marking would be used later during reconstruction.
Rear view showing new interior wood paneling and wood framing. (not shown: "curbing at outside edge)

When removing the interior paneling, remove and replace each piece one at a time. This will help your trailer remain "square" and insure that the removed skin will still fit!

Curbing in place, support for tail lights and insulation installed

 Vapor barrier on top of insulation

I you are rebuilding or replacing any interior paneling on the side walls, remove any cabinets, or replace the floor you will need to leave the front end and back end open until all the interior work is complete.

Happy Glamping!

Thursday, October 23, 2014

Glamper Remodel: Tools you will need

When remodel-storing one of the beauties, you might face a few challenges. They REALLY don't want to "give up their secrets" without a struggle.

Sometimes the screw (hex head) in my case will refuse to budge.  I fount that while using the screwdriver (or socket driver) and tapped with a hammer will free them up. But, to remove those pesky screws that are either stripped or "spin" freely you will want to invest in these little beauties that can be found here.

Lee Valley Tools LTD.

 After you remove all that "J" rail, windows, and service doors, and eyebrows you will need paint stripper, "SOS" cleaning pads, steel wool and aluminum polish to make things really shine. Here are some of the products I found through trial and error that work the best. (And no, I'm not a paid sponsor and your results just might differ from mine. Just trying to save you some $$ is all.)

(all can be found at your local Walmart)

Using the above will help take you from this


 Happy Glamping!


Wednesday, October 22, 2014

Glamper Remodel: Taking Care of the Important Things First

I know, you just wanna get to the decorating part, but in his case we are sooooo far from that!
You need to make sure she is SAFE! Remember to "do as I say, and not as I did", because I didn't know any better at the time.

I grabbed my son's car and drove 100 mi. to pick her up, looked at her for about 10 minutes, paid the man, hooked her up and made a b-line home because I had to make a flight. Drove WAAAY to FAST on tires that as my son said "Mom, I've never seen tires so bad!"


All I can say, is it was MEANT to BE!!!

So off to find three new tires, and then a lesson in re-packing wheel bearings, so that she will now roll merrily along safely!


Happy Glamping!

Glamper Remodel: Getting Started

So now you've decided to take the plunge.I highly recommend that you watch Larry of Canned Ham Trailers video series' on YouTube before you start! He restores canned ham campers and produces EXCELLENT (did I say EXCELLENT) tutorials for he entire project! His website is stuffed with info to! He has videos on remodeling a Shasta, Westerner & DeVille.

Once you bring that little gem home, you will need a BIG tarp to cover her (or water tight storage building) so that your neighbors won't complain to loudly, and a BIG plastic sheet to go under it.
Who knew tarps weren't water tight!


Also, make sure you put a pole up through the vent hole (or by other means) to create a "tent effect" or later down the line, you might suffer like I did with this . . .

All that new wood got wet!

And, if you are like me and don't have extra storage space for all the parts you take out . . .
you will also need to build this . . .

made from PVC pipe

Don't forget to apologize to all your neighbor too. I just let them know it was going to get a lot uglier, before it got better!

Happy Glamping Ya'll

Tuesday, October 21, 2014

Glamper Showing her UGLY

Well now that you viewed how she looked from the outside, (not to shabby), I thought I would give you a tour of her interior (not so pretty). At first glance, she's not to bad, but on closer inspection, her wrinkles start to show.

First view is the dinette area(with 1970ish) AC unit

Next the rear with the double bed and single canvas bunk
the " kitchen area"


Upon closer inspection, besides the peeling veneer, there was MOLD (YIKES!!!)
Lots of mold . . . almost all interior paneling will HAVE to go.
Upon seeing her for the first time, my son said, "Holy C***!, Mom, it sleeps 5!"
I responded, "Nope, she only sleeps ONE!"

Let the process begin! First scheduled campout with the Getaway Gals is in June!

Sunday, October 19, 2014

Glamper in the Making

It has been a dream of mine for the last couple of years to remodel a little canned ham camper and turn it into a Glamper just for ONE! But as we all know, LIFE can sometimes get in the way! Well, after searching Craigslist for just the right one, the planets all aligned and now she is mine!
She is a 1960 Mobile Scout, produced in Arlington, TX so in a way she has come home.
Follow along as take you through her complete transformation!
(she really needs a major facelift ~ she is 54 after all)
Here are a few more of her before photos!


Grab My Button

Honeydew Productions

LinkWithin

Related Posts with Thumbnails